一.引入Element按钮,Container布局容器,菜单侧边栏
1.简单回顾vue的安装和创建项目。
2.访问Element官网。 链接:https://element-plus.org/zh-CN/component/button.html 选择红色按钮,
复制红色按钮的代码到vscode的app.vue文件。
1
2
3
4
5
6
7
8
9
10
| <script setup>
import { ElButton } from 'element-plus'
</script>
<template>
<el-button type="info">Danger</el-button>
</template>
<style scoped>
</style>
|
3.发现红色按钮位置是在正中间,是错误的。后来经过老师的提示,要把main.js文件中下列居中代码删掉。
1
| import './assets/main.css'
|
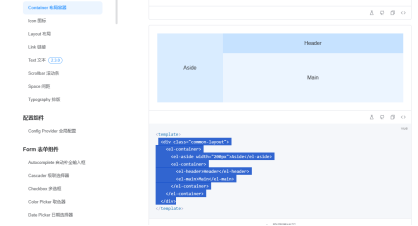
4.找到要用到的布局,先查看它的代码,再复制到app.vue。
1
2
3
4
5
6
7
8
9
| <div class="common-layout">
<el-container>
<el-aside width="200px">Aside</el-aside>
<el-container>
<el-header>Header</el-header>
<el-main>Main</el-main>
</el-container>
</el-container>
</div>
|
5.找到要用到的菜单侧边栏,先查看它的代码,再复制到app.vue。
1
2
3
4
5
6
7
8
9
10
11
12
13
14
15
16
17
18
19
20
21
22
23
24
25
26
27
28
29
30
31
32
33
34
35
36
37
38
39
40
41
42
43
44
45
46
47
48
49
50
51
52
53
54
55
56
57
58
59
60
61
62
63
64
65
66
67
68
69
70
71
72
73
74
75
76
77
78
79
80
81
82
83
84
85
| <template>
<el-row class="tac">
<el-col :span="12">
<h5 class="mb-2">Default colors</h5>
<el-menu
default-active="2"
class="el-menu-vertical-demo"
@open="handleOpen"
@close="handleClose"
>
<el-menu-item index="2">
<el-icon><icon-menu /></el-icon>
<span>Navigator Two</span>
</el-menu-item>
<el-menu-item index="3" disabled>
<el-icon><document /></el-icon>
<span>Navigator Three</span>
</el-menu-item>
<el-menu-item index="4">
<el-icon><setting /></el-icon>
<span>Navigator Four</span>
</el-menu-item>
</el-menu>
</el-col>
<el-col :span="12">
<h5 class="mb-2">Custom colors</h5>
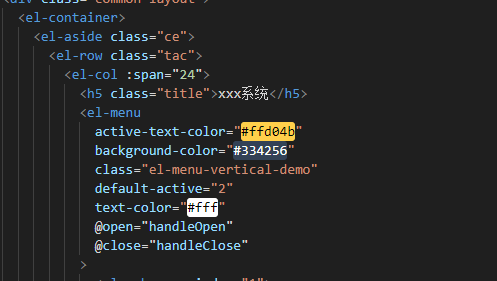
<el-menu
active-text-color="#ffd04b"
background-color="#545c64"
class="el-menu-vertical-demo"
default-active="2"
text-color="#fff"
@open="handleOpen"
@close="handleClose"
>
<el-sub-menu index="1">
<template #title>
<el-icon><location /></el-icon>
<span>Navigator One</span>
</template>
<el-menu-item-group title="Group One">
<el-menu-item index="1-1">item one</el-menu-item>
<el-menu-item index="1-2">item two</el-menu-item>
</el-menu-item-group>
<el-menu-item-group title="Group Two">
<el-menu-item index="1-3">item three</el-menu-item>
</el-menu-item-group>
<el-sub-menu index="1-4">
<template #title>item four</template>
<el-menu-item index="1-4-1">item one</el-menu-item>
</el-sub-menu>
</el-sub-menu>
<el-menu-item index="2">
<el-icon><icon-menu /></el-icon>
<span>Navigator Two</span>
</el-menu-item>
<el-menu-item index="3" disabled>
<el-icon><document /></el-icon>
<span>Navigator Three</span>
</el-menu-item>
<el-menu-item index="4">
<el-icon><setting /></el-icon>
<span>Navigator Four</span>
</el-menu-item>
</el-menu>
</el-col>
</el-row>
</template>
<script lang="ts" setup>
import {
Document,
Menu as IconMenu,
Location,
Setting,
} from '@element-plus/icons-vue'
const handleOpen = (key: string, keyPath: string[]) => {
console.log(key, keyPath)
}
const handleClose = (key: string, keyPath: string[]) => {
console.log(key, keyPath)
}
</script>
|
6.在app.vue中删除下列代码的string
1
2
3
4
5
6
| const handleOpen = (key: string, keyPath: string[]) => {
console.log(key, keyPath)
}
const handleClose = (key: string, keyPath: string[]) => {
console.log(key, keyPath)
}
|
7.把span=12改成span=24,侧边栏span=24表示占满 el-col :span=”24”表示竖直方向占满
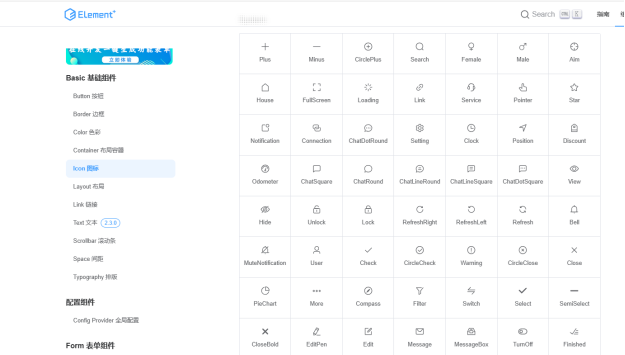
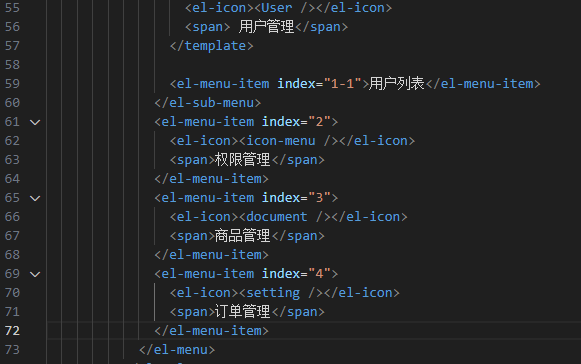
8.在侧边栏导入图标,复制代码在对应的用户管理,权限管理,商品管理,订单管理语句各自的前一行。
1.在el-header中创建styled-box1类。
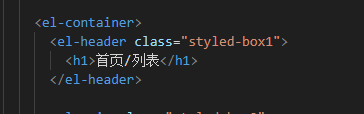
在style创建styled-box1样式。
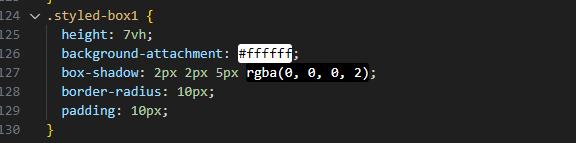
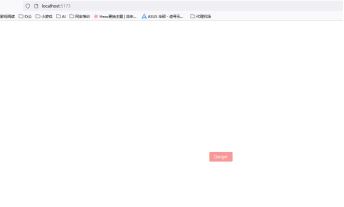
2.CTRL+S保存,在终端输入npm run dev, 结果如下图

3.引入搜索框input和搜索,添加用户两个按钮,注意el-row是行,el-col是列。
1
2
3
4
5
6
7
| <el-row>
<el-col :span="4"
><el-input v-model="input" placeholder="请输入搜索内容"
/></el-col>
<el-col :span="2"><el-button type="success">搜索</el-button></el-col>
<el-col :span="2"> <el-button type="success">添加用户</el-button></el-col>
</el-row>
|

三.引入表格和分页
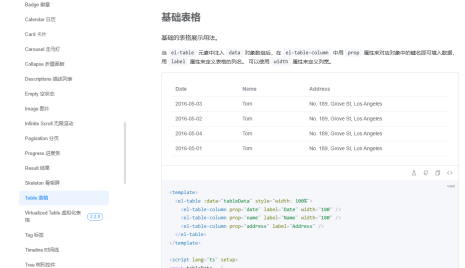
1.找到表格,复制代码引入app.vue
1
2
3
4
5
6
7
8
9
10
11
12
13
14
15
16
17
18
19
20
21
22
23
24
25
26
27
28
29
30
31
32
| <template>
<el-table :data="tableData" style="width: 100%">
<el-table-column prop="date" label="Date" width="180" />
<el-table-column prop="name" label="Name" width="180" />
<el-table-column prop="address" label="Address" />
</el-table>
</template>
<script lang="ts" setup>
const tableData = [
{
date: '2016-05-03',
name: 'Tom',
address: 'No. 189, Grove St, Los Angeles',
},
{
date: '2016-05-02',
name: 'Tom',
address: 'No. 189, Grove St, Los Angeles',
},
{
date: '2016-05-04',
name: 'Tom',
address: 'No. 189, Grove St, Los Angeles',
},
{
date: '2016-05-01',
name: 'Tom',
address: 'No. 189, Grove St, Los Angeles',
},
]
</script>
|
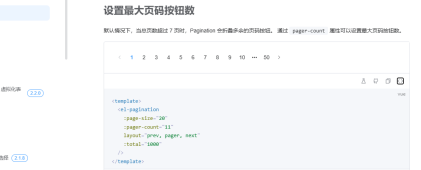
2.找到分页,引入分页
1
2
3
4
5
6
7
8
| <template>
<el-pagination
:page-size="20"
:pager-count="11"
layout="prev, pager, next"
:total="1000"
/>
</template>
|
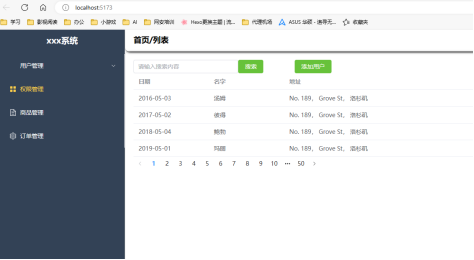
刷新浏览器页面,最终的页面如下: